Pages

Monday, June 30, 2014

Turning from KEEPER to GIVER

Dear friends.

I have always been a "keeper", I have kept stuff. I grow very fast and deeply attached to things. It became very obvious a couple of weeks ago, when my parents wanted us to sort the stuffed animals. My sister and I where doing that together. I had like a zillion animals and a hard time letting go. So in the end I kept about 10 for me and another 10 for giving away to friends who get babies (as if 10 people would get kids soon, but anyways). My sister kept 1! As in: ONE. Well she didn't have a zillion to "choose" from, I don't think it even was ten she had. She almost kept 2, but then she decided to let go of the other bear.
I am proud of you!

Even though I had a hard time letting go of my stuffed animals, I am letting go of my books and DVDs. That's quite phenomenal, because books where my best friends when growing up. But I do not need to keep every book.
I had about 80 DVDs, I kept about 10. The others and some books went to the open bookshelf in the skandinavian department in university (I bought them in Norway, the texts on the back are norwegian, and they are english with subtitles, not very common in germany, and no german subtitles). So here's a little before and after of the open bookshelf. The pictures are crazy blurry, I know!


I am turning from Keeper to Giver. It's a process, it's hard work, but I am getting there!

Saturday, June 28, 2014

A little Saturday night fun...

I found this blogger who is blogging about hairstyles and beauty. It's the wonderful Abby Smith with her blog Twist Me Pretty. She has a really beautiful Nail Art with ombre nails. Her tutorial is to be found here:Ombre Nail Art. As I had a day off (I've had a bad cold for like 4 weeks now, so I rest a lot. As well as I decided that I do not have to do any university-stuff in the weekends).

So here is one picture on how it looked "on the way", before the ombre. And then the ombre nails. My colours aren't as vibrant as Abbys, but my fun colours (pink, red, orange and yellow) were a little thicker (and quite old as well), so I decided for the first try to go for my newer colours.


I hope you're having a GREAT weekend so far.

Friday, June 27, 2014

Transforming old tops... into NEW ones.

So, this project has been waiting for me for a long time. I've wanted to do it for ages, but never got the juices flowing. Just to show how long it's been:


Now, being off the medication for depression, energy and motivation have reentered my life. True, I am crazy close to tears all the time. Like yesterday, you know: WorldCup, Germany playing against the USA. I was at university during the game, but we had some laptops so we knew how it was going (1:0 for us in the end). It was nice, but did not touch me emotionally. On my way home there were cars honking and people screaming and making happy sounds. Then I cried. Not a lot, but my eyes were full of tears, one might even have rolled.That's how much I enjoy the recovery of national pride.

Now, back to my project: I have had some tops that were too short. I do not like for my belly to show ;) ... At the same time I've had some tops that were ugly under the arms. Dark spots. So I combined two of those into one new:


All of it is totally eyeballed, I will take you through all
of the steps I did. The fun thing is: It turned out great even though it's not perfect. Nobody takes notice of the plaid that's not precisely in the middle. You will, now that you know ;)


This is how I did it:
1.  I cut off the top section of the top with the ugly top:
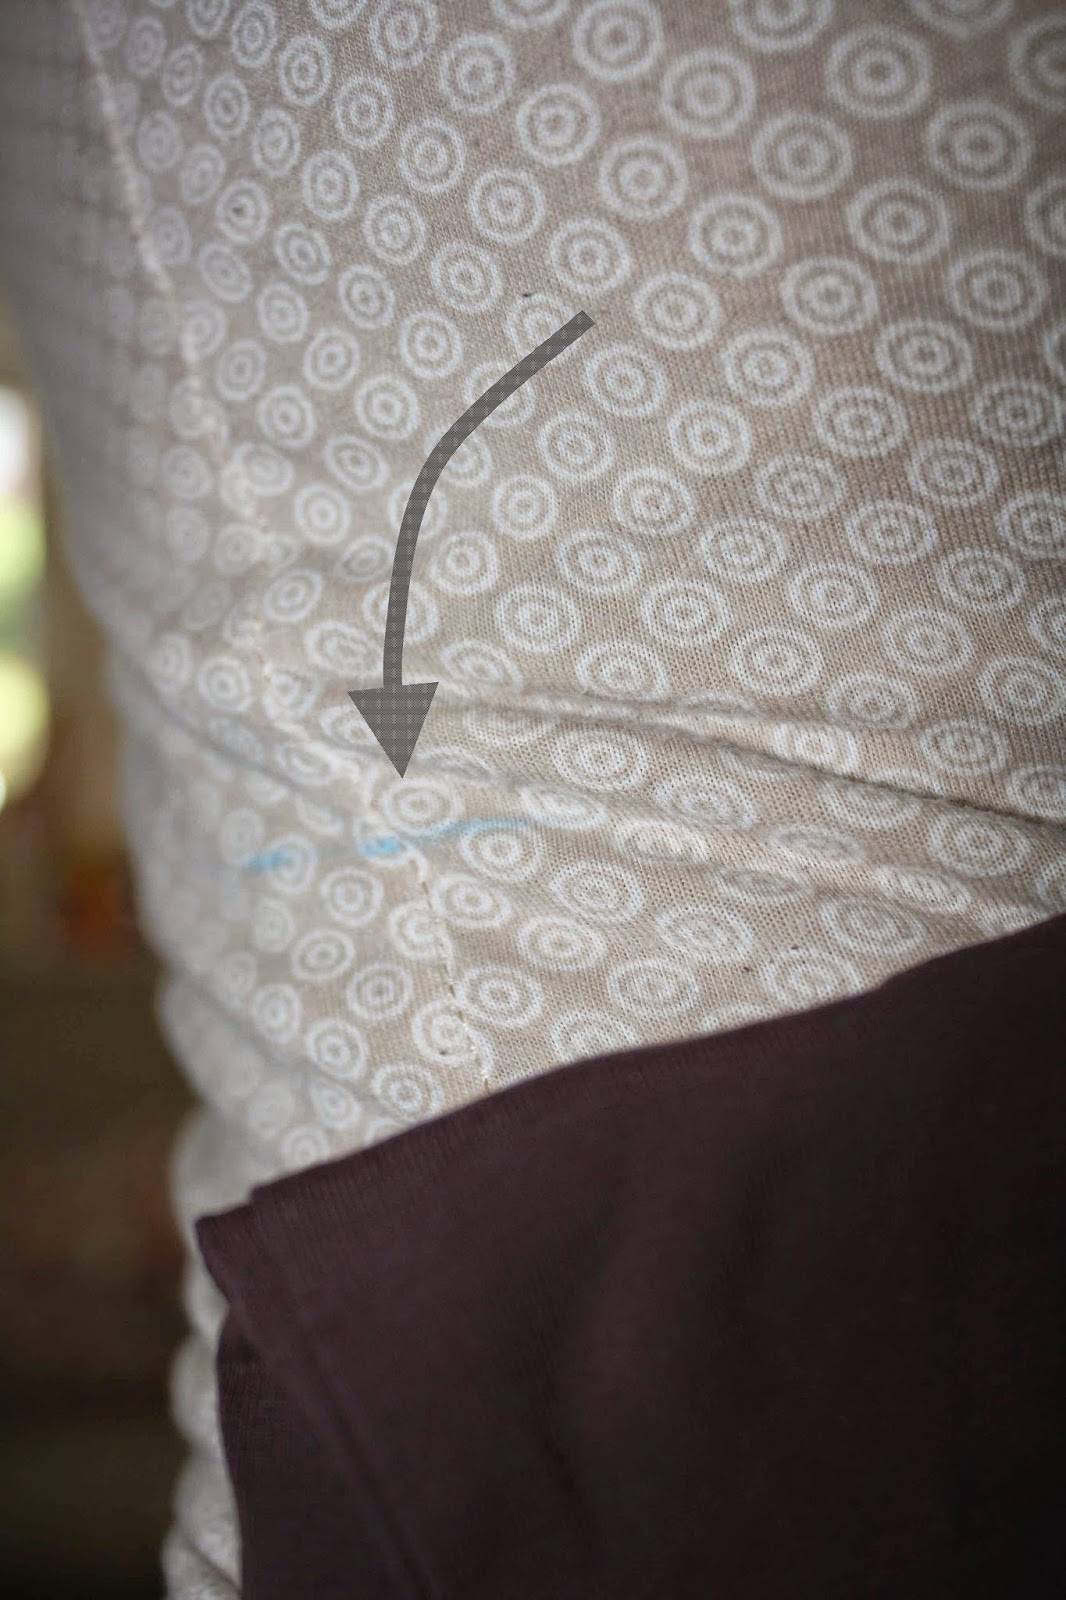
2. I put on the shirt I wanted as new top section (you might want to turn it inside out, just because the markings will not show in the end, but nobody noticed the markings, so who cares), I took the lower section to the mirror and decided where I wanted both parts to come together and marked it with blue tailor's chalk (my mom's equipped me well).


3. Next step was actually measuring where the marking was (15,5 cm) from the armpit.


 4. After that I marked 15,5 cm on the other side of the top as well and lay the measuring tape from one side to the other and marked below the tape from both sides for 1cm seam allowance:

5. Now you cut it. I did not take a picture of this ;)

6. Put right side to right side (the upper part was the right way, the bottom part was turned inside out). Put the seams on top of each other first and pin them together. Then you go around pinning it all together.

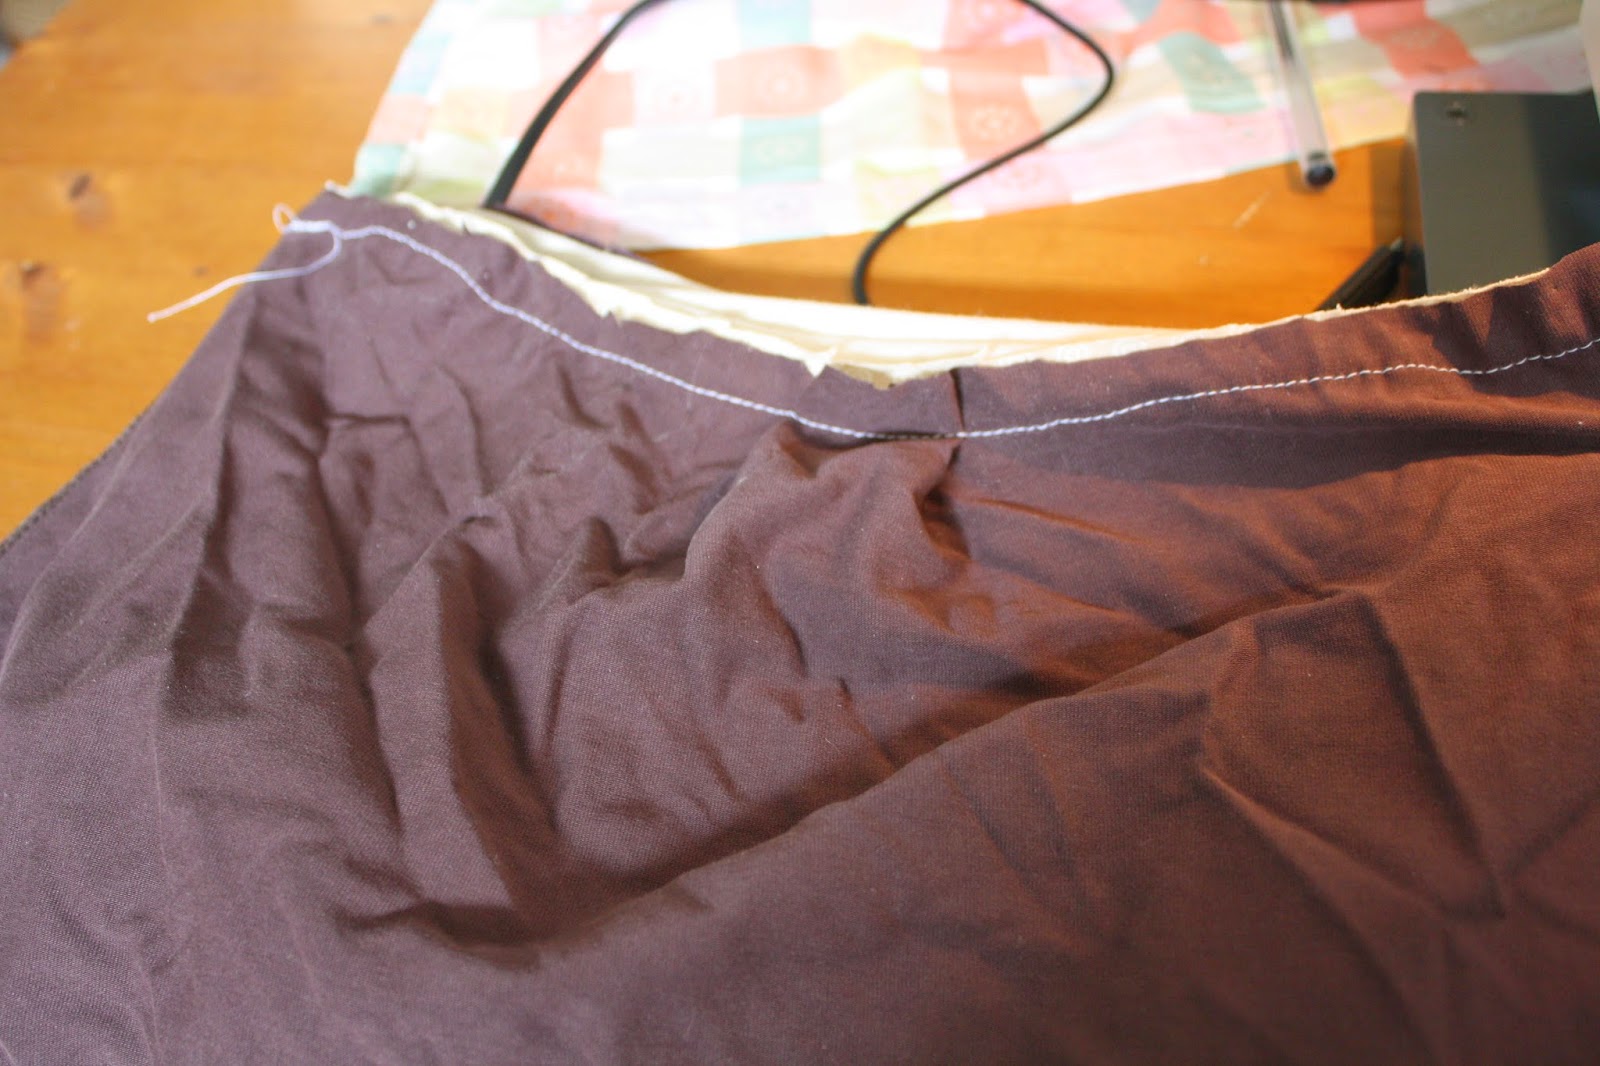
7. Maybe one section is bigger as the other?  It was like that for me. So I made a plait (roughly in the middle, both front and back). I just tried which way it looked better and decided for this, having the excess fabric on top layed to both sides:


8. Take out your machine and vaccum it. Put it up and sew both sides together. You totally see that I never cut even, I just went with the flow. If you are impatient (like me) you take out the pins as you go and look at how nice it's coming together ;)


9. Done with sewing around. (Now I actually pulled it to the right side and took the pictures of the end product - impatience galore). But there's another important step: NOW I cut around it all to make it nice and even.

10. Sew around with a zigzag stitch, you don't want the fabric to dissolve in the washing and your seam get open in the process:


11. Now you can turn it and enjoy your product (I'll be honest, these are the pictures I took BEFORE the zigzagging):


Just now (10 pm yesterday) I took some pictures of me wearing this. I like it best on the hanger, but am getting used to wearing it as well ;)


That thingy in the neckline? That's another post coming soon.

Have a great weekend!

This is now (Saturday 28.06.) part of the Sewing Saturday Link-up at Simple Simon and Company. Check out their page, I love it!

Monday, June 23, 2014

Creating art

So I read this other blog (younghouselove), it's a couple that is DIYing a lot. They also go "House Crashing" and visit other peoples houses. In one of these House Crashing Posts they show pictures from an american lady living in the UK. And man hat she beautiful pictures on her walls. And she made them herself! They were so totally up my alley that I instantly decided that I would try that.

I am really into (polka) dots and really liked this apron. So I decided to put the both together.

The words are taken from a postcard hanging in a friends toilet.

Take three - make one:

Step 1:
stick the words with stickers: [Well, I forgot a "T" in the words! But my sister said to me: You usually say it like that Beau-iful, so she never commented ;) I guess I do say it like that, but that was not the plan... impatient girl ;) ]
 I really liked the look of it. I could've just kept it that way ;) But now I wanted to try this.

Step 2:
Take yellow, make short brushstrokes. Add a little red to the yellow, make more brushstrokes, repeat this process.

Step 3: Let dry. I am a little impatient. Especially with art.
Step 4: But I will wait till it's dry and then peel off the stickers. I am a little concerned if the stickers go off ;)


Step 5: Hang it where you want it. It's a little small, I think, it looks even smaller on the pictures than in reality!... I just wanna go and buy a real big canvas ;) But I think I will just go with another of the small ones to add to it ;)


Have a great week peeps.